Recipe: Parmesan Zucchini Fries with the Simplest Marinara

This week, we are exploring the vast world of alternative french fries - fries made out of something other than white potatoes!  We love this recipe for zucchini fries, but without a proper dipping sauce, what's the point?  Traditional ketchup didn't seem appropriate, but a marinara sounded just right.  We had some Sir Kensington Classic Ketchup on hand...after trying it we thought it was so close to a real tomato favor that with a little tinkering it could be transformed into a simple marinara dipping sauce - boy were we right!  This little dipping sauce is packed with delicious flavor and made from - that's right - ketchup. We wouldn't recommend trying this with just any ketchup, but Sir Kensington is rich enough in flavor that it works like a charm!

Recipe: Parmesan Zucchini Fries with the Simplest Marinara | SavoryPantryBlog.com

Zucchini Fries with Marinara Dipping Sauce

  • 3 zucchini quartered lengthwise
  • 1/2 cup grated Parmesean
  • 1/2 tsp dried thyme
  • 1/2 tsp dried oregano
  • 1/2 tsp dried basil
  • salt and pepper to taste
  1. Preheat oven to 350 degrees F. Coat a cooling rack with nonstick spray and place on a baking sheet; set aside.
  2. In a small bowl, combine parmesan, thyme, oregano, basil, garlic powder, salt and pepper, to taste.
  3. Place zucchini onto prepared baking sheet. Drizzle with olive oil and sprinkle with parmesan mixture. Place into oven and bake until tender, about 15 minutes. Then broil for 2-3 minutes, or until the crisp and golden brown.
  4. Serve immediately, garnished with parsley, if desired.

For dipping sauce:

  • 1/4 cup Sir Kensignton Classic Ketchup
  • 1 tsp minced garlic
  • tsp minced fresh basil
  • 1/2 tsp dried oregano
  • 1/4 tsp red pepper flakes
  • pinch of salt and pepper to taste

Combine all ingredients in a small bowl and serve with zucchini fries. 

Recipe: Parmesan Zucchini Fries with the Simplest Marinara | SavoryPantryBlog.com
Print Friendly and PDF

Recipe: "Make Ahead" Yogurt Parfaits

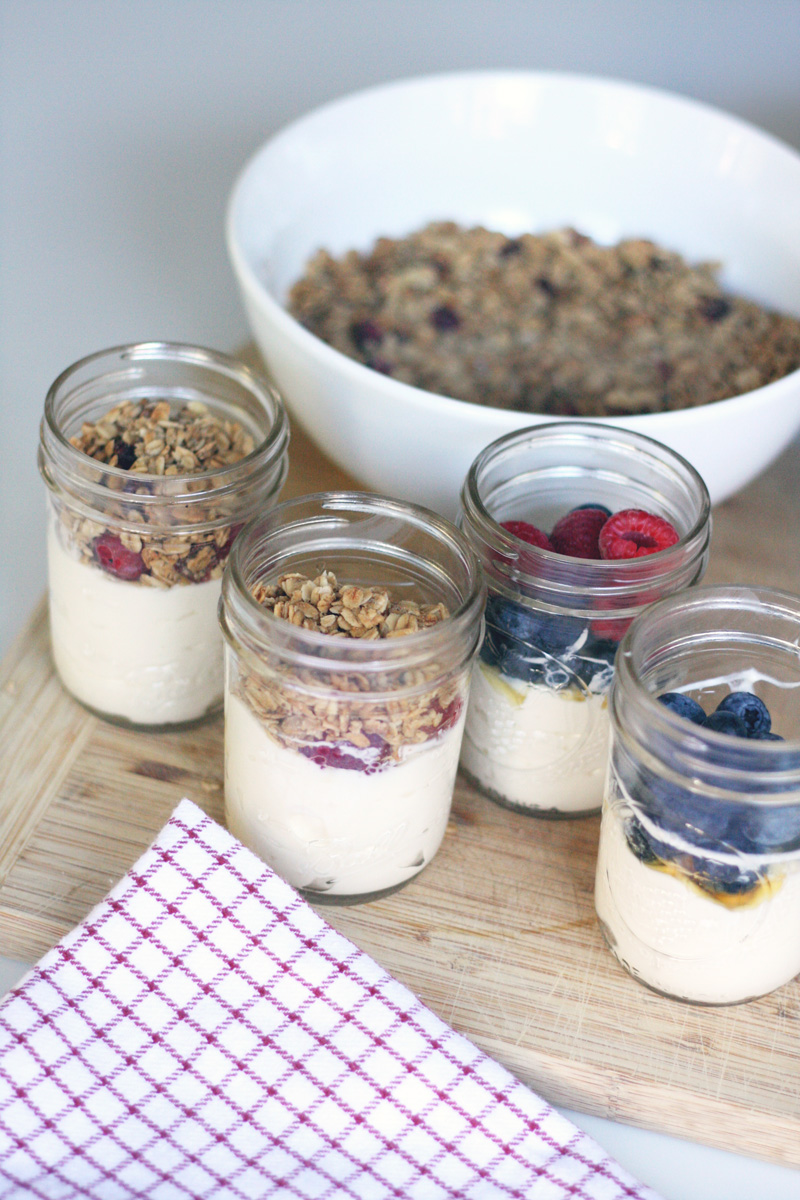
Whether you have a little on to get off to school or not, mornings can be hectic.  Anything you can do to prep for the morning makes it flow more smoothly.  That's why we're loving these "make ahead" parfaits.  A package of 12 8oz. mason jars is just under $10 at most grocery stores - cheaper than rubbermaid - and better yet, reusable and last a lifetime.

After some experimentation, we found that layering your fruit between the yogurt and granola keeps the granola from getting soggy.  And isn't that the whole point?  That CRUNCH!  Nothing worse than nabbing a parfait on the go only to have the granola be pure mush!  We made these and kept them in the fridge fro up to 3 or 4 days, depending on the ripeness of whatever fruit you choose.  Change it up and try a layer of jam or preserves if fresh fruit is unavailable!

Recipe: "Make Ahead" Yogurt Parfaits |SavoryPantryBlog.com #parfait #masonjar

"Make Ahead" Yogurt Parfaits

  1. Fill each jar with a half cup of yogurt (the measurements are right on the side of the jar if you use Mason jars!)

  2. Drizzle with honey

  3. Top with a layer of fresh fruit or berries

  4. Finish with a handful of granola

  5. Pop a lid on each jar and store in the refrigerator for up to 3 or 4 days depending on the ripeness of your fruit.

Recipe: "Make Ahead" Yogurt Parfaits |SavoryPantryBlog.com #parfait #masonjar
Print Friendly and PDF

Recipe: Homemade Raspberry Poptarts

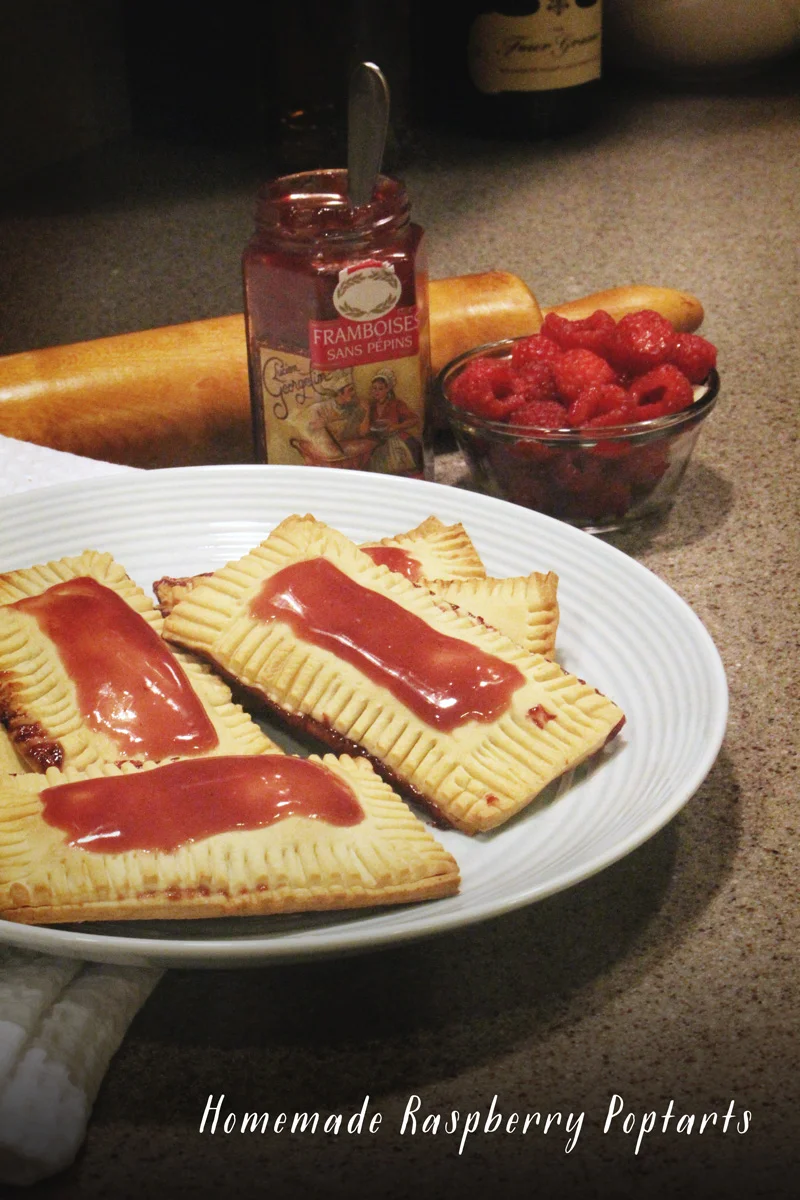
We sell lots of jam - Sarabeth’s Preserves, American Spoon, Scandinavian Delights, Les Moulins Jam, and Bathtub Gin - just to name a few!  Our customers are always asking us how to use jams and jellies - beyond toast.  I suggest using it for pound cake filling, fill and roll some puff pastry, or put it over some cream cheese for a dip on a cracker.  Since its “back to school” time for lots of folks young and old, I decided to share a simple homemade Poptart recipe.  You can use your favorite pie crust recipe or use a pre-made crust from the store, depending on how much time you have.  

I used Lucian Georgelin Seedless Raspberry Jam from France.  Silky and smooth, made in very small batches, this jam uses more fruit and less sugar and has a buttery finish.  

Recipe: Homemade Raspberry Poptarts | SavoryPantryBlog.com #poptart

Homemade Raspberry Poptarts

  1. Preheat your oven to 350.
  2. Using a floured surface and rolling pin, roll out pie dough to about ⅛ thickness.
  3. Trim edges to make a large rectangle.
  4. Cut into smaller rectangles. (whatever size you want your pop tarts to be, mine were about 3"x6")
  5. Spread jam onto half of the rectangles.  Cover each with the remaining dough rectangles.
  6. Use a fork to press the edges of the dough closed.
  7. Place on an ungreased cookie sheet and bake for approximately 12 minutes.  
  8. Allow pop tarts to cool for 5-10 minutes before serving.
  9. As a topping, I mixed some confectioners sugar into some jam to create an icing and spread on top of each pop tart.
Recipe: Homemade Raspberry Poptarts | SavoryPantryBlog.com #poptart
Print Friendly and PDF

Recipe: Policker Jam Carrot Cake Griddle Cakes

With kids going back to school and summer winding down it's a great time to reconsider breakfast staples.  We love this recipe for Potlicker Jam Carrot Cake Griddle Cakes as an twist on the classic pancake.  Sugar is substituted for the Carrot Jam, boosting flavor while reducing the overall sugar content of the dish.  These make a thicker, fluffier pancake so it may be a good idea to keep them on the smaller side for portioning.  

Recipe: Potlicker Jam Carrot Cake Griddle Cakes | SavoryPantryBlog.com

Policker Jam Carrot Cake Griddle Cakes

Whisk the dry ingredients together in a large bowl:

  • 1 c flour
  • 1 -1/2 tsp baking powder
  • 1/2 tsp baking soda
  • 1/4 tsp salt

Whisk the wet ingredients together in a small bowl:

  • 1/2 c Carrot Cake Jam
  • 3/4 c yogurt (We use Cabot Greek Yogurt)
  • 2/3 c milk
  • 3 tbsp butter, melted
  • 1 large egg
  • 1 tsp vanilla

Stir the wet ingredients into the dry ingredients. The batter will be thick and lumpy. Ladle 1/4 cup per pancake onto hot griddle. Cook pancakes for 3-4 minutes per side or until the edges firm and the batter bubbles stop popping. Flip gently.

This cake batter is thicker than the average griddle cake so be patient when cooking and flip gently otherwise you will end up with cake batter griddle cakes.

Serve with warm syrup and toasted pecans.

Recipe: Potlicker Jam Carrot Cake Griddle Cakes | SavoryPantryBlog.com
Print Friendly and PDF